Building Your Brand Series pt 2: Making a Mood Board

In my last post in the Building Your Brand series, I talked about writing a brand statement. Hopefully you’ve done that and are ready for the next step in the branding process: creating a mood board. A mood board can serve as a great visual reference to help you understand your aesthetic leanings. We all gravitate to certain photos or designs almost instinctively. The point of this process is not to just collect a bunch of disparate images though. The goal is to find images or objects that your drawn to but that also communicate your brand.
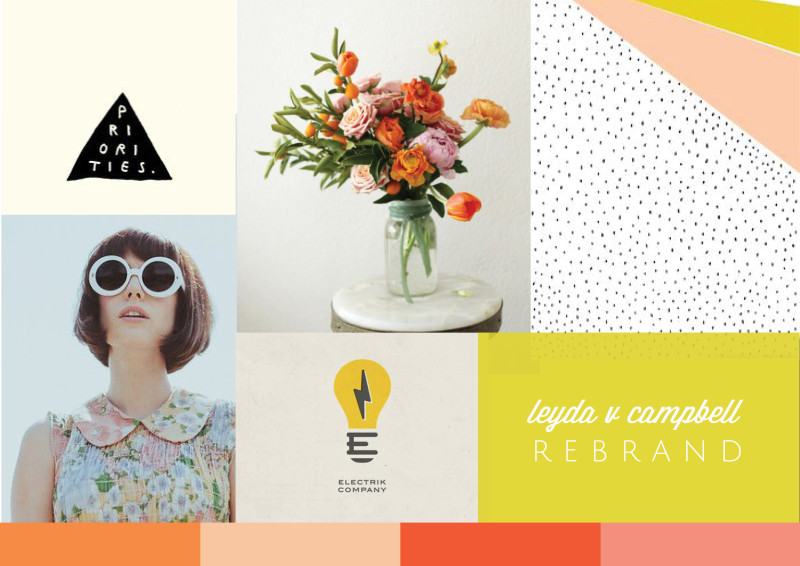
There are many ways to create a mood board. You can create a physical board or book that contains photos, magazine pages, even small objects like feathers or leaves. Go Moodboard is a free service that lets you easily create a mood board by uploading images to their site and they do all the work for you. Photoshop can also be used and there is a great tutorial on how to do it here. How do I do it? First I collect images via Pinterest and pin them to board. Once I have a series of images I refine it down. Then I bring those photos into InDesign and lay them out. It’s pretty easy especially if you set up a grid before you start placing your photos. Whatever way you choose to do it, make sure that your mood board doesn’t become a dumping ground for any idea or image you like. Keep referencing your brand statement to make sure your choosing things that are visually appealing but also speak to your brand. Here’s mine:

Every element here features color, type, and style that relates to who I am and how I want my brand to be perceived. Friendliness and approach-ability are important to me when it comes to how my clients perceive me. I also don’t want to shy away from my personal quirkiness. It can be hard to find the right balance of communicating professionalism and competency while not sacrificing your personality. Only you know that balance. You should feel 100% comfortable with your brand. If any elements give you pause, ditch them.
Through this process I hope you’re starting to get a more concrete sense of your brand. In the next part of the series, I’ll talk about establishing your voice and using it to present a consistent message. In the meantime, I’m still working away at my own branding and will be showing you glimpses along the way.
Oh and here are the photo credits from my moodboard (starting top left and going clockwise): 1. /2. (if anyone knows who to credit for this let me know!)/ 3. /4. / 5.


